Tutorial 3: C# Basics#
The scope of this laboratory covers the fundamentals of the C# language (syntax, type system, primitive types, arrays, parameters) and creating custom types (classes, structs, interfaces, inheritance, enums).
Since you already know C++, many constructs in C# will feel familiar. Before starting the task, we will discuss the key differences and concepts. Above all, in C# we do not separate declarations from implementations (there is no separation into header files .h and source files .cpp) – all class and struct code is defined directly in .cs files.
Namespaces#
Similarly to C++, in C# you use namespaces to group related code and avoid naming collisions. In C#, the dot (.) operator is used to reference namespaces as well as members of classes and structs (e.g. System.Console.WriteLine).
The using directive allows importing a namespace into the current file, enabling direct use of its types without specifying the fully qualified path (e.g. using System;). In modern C# versions, file-scoped namespaces are commonly used to avoid an extra level of indentation:
namespace MyApp.Core;

// All code in this file belongs to MyApp.Core
public class Calculator
{
    // ...
}
Classes and Structs#
In C++, the difference between class and struct comes down merely to the default member visibility. In C#, this difference pertains to memory management.
- Classes (
class) are reference types. They are allocated on the heap, and their lifecycle is managed by the Garbage Collector. A variable holding a class instance holds a reference to the object. Classes are intended for complex objects that have their own identity, require a longer lifespan, or leverage inheritance. - Structs (
struct) are value types. They are allocated on the stack or embedded directly within other objects. Assigning a struct to another variable or passing it as an argument to a method creates a full copy by default. Structs are used for small data types (typically up to ~16 bytes).
Properties#
Encapsulation is one of the pillars of object-oriented programming. To hide class fields, access methods are often created (e.g., float GetX(), void SetX(float v)). C# supports encapsulation natively through Properties. From the outside, you use them just like regular fields, but under the hood, the compiler generates hidden accessor methods for reading and writing:
public struct Point3
{
    // Private, backing field
    private float x;

    // Classic property
    public float X
    {
        get { return x; }
        set { x = value; } // 'value' is the implicit setter parameter
    }

    // Auto-property - compiler generates the backing field
    public float Y { get; set; }

    // Read-only property from the outside
    public float Z { get; private set; }
}
Accessing defined properties looks as follows:
Point3 p = new Point3();
p.X = 5.0f;       // Uses setter
float val = p.X;  // Uses getter

// p.Z = 2.0f; // Error: setter is privateArrays#
In C#, arrays are reference types and always know their size (Length). C# checks array bounds – accessing an out-of-bounds index throws an IndexOutOfRangeException.
// Create an array of 100 elements (initialized to default values, 0 for int)
int[] numbers = new int[100];
int length = numbers.Length; // Array knows its size
Beyond single-dimensional arrays (and jagged arrays, i.e., arrays of arrays), C# also supports built-in, memory-contiguous multidimensional arrays:
// 2D array [width, height]
float[,] grid = new float[800, 600];
grid[0, 0] = 1.5f; // Access specific element
The object Type and the ToString() Method#
In the C# type system, every type (both reference and value types) inherits from System.Object (in short, object), meaning that every instance has access to a standard set of methods.
A frequently used method is the virtual ToString() method, which returns a string representation of the object. By default, it returns the type name, but you will usually want to override it using the override keyword:
public struct Point3
{
    public float X { get; set; }
    public float Y { get; set; }
    public float Z { get; set; }

    // Override the built-in ToString() method from object
    public override string ToString()
    {
        // String interpolation
        return $"[{X}, {Y}, {Z}]";
    }
}
Example usage in practice:
using System;

// Object initialization syntax
Point3 p = new Point3 { X = 1.0f, Y = 2.0f, Z = 3.0f };

// Automatically calls ToString() under the hood
Console.WriteLine(p); // Output: [1, 2, 3]
Task 1 - Ray Tracing#
In this task, you will build a simple ray tracing application based on materials from the book Ray Tracing in One Weekend. It will consist of a single project – an executable application.
Ray tracing is an image generation technique where rays are cast from the observer (camera) through each pixel of the viewport into the scene. The algorithm then computes intersections between the rays and objects, using this information to calculate the final pixel color.
Stage 1: Color Representation and Image Generation#
We begin by defining two types: a vector struct (which we will also use to represent points and colors) and an image class.
The Vector3 Struct#
We will use a struct aggregating three numbers whose components (X, Y, Z) can correspond to RGB channels (Red, Green, Blue) or 3D spatial coordinates. Create a file named Vector3.cs and define:
- Public
floatpropertiesX,Y, andZ. - A public constructor taking three values and assigning them to the properties.
- An overridden
ToString()method returning the vector components separated by a space (e.g."1.5 0.2 0.8").
The Image Class and PPM Format#
An image is treated as a two-dimensional grid of pixels. Create an Image class (Image.cs). The class should contain:
- Public read-only
intpropertiesWidthandHeight. - A private two-dimensional array
Vector3[,] Pixels. - A constructor taking width and height that initializes the 2D array.
- A two-dimensional indexer (
public Vector3 this[int x, int y]), serving as C#’s counterpart to the overloadedoperator[]in C++. Thegetaccessor should return the pixel fromPixels[x, y], and thesetaccessor should assign the passedvalueto it. It will be used for convenient reading and writing of pixels (e.g.,image[x, y] = color).
To export the rendered image, we will use the simple text-based PPM format. Rather than implementing a dedicated file-saving method, we will implement PPM formatting inside the overridden ToString() method. Calling Console.WriteLine(image) will write the text representation to standard output, which we can then redirect to a file.
The PPM format structure is as follows:
- Magic string
P3. - Image width and height (separated by a space).
- Maximum color value (
255in our case). - Integer RGB values for each pixel (starting from the top-left corner). Row formatting can vary, as long as numbers are separated by whitespace.
Below is an example PPM file for a 3x2 image:
P3
3 2
255
255   0   0     0 255   0     0   0 255
255 255   0   255 255 255     0   0   0
Your task is to implement the ToString() method. Append the appropriate PPM header, then iterate through all pixels using nested loops. Map each vector’s float component to the RGB range ([0, 255]), ensuring values stay within bounds (e.g. using Math.Clamp).
Because we will be building a string containing millions of values, using string concatenation (the + operator) in a loop would be very inefficient due to constant allocations. Use the StringBuilder class (from System.Text) to construct the output efficiently.
Generating the First Image#
In the Main method of Program.cs:
- Create an
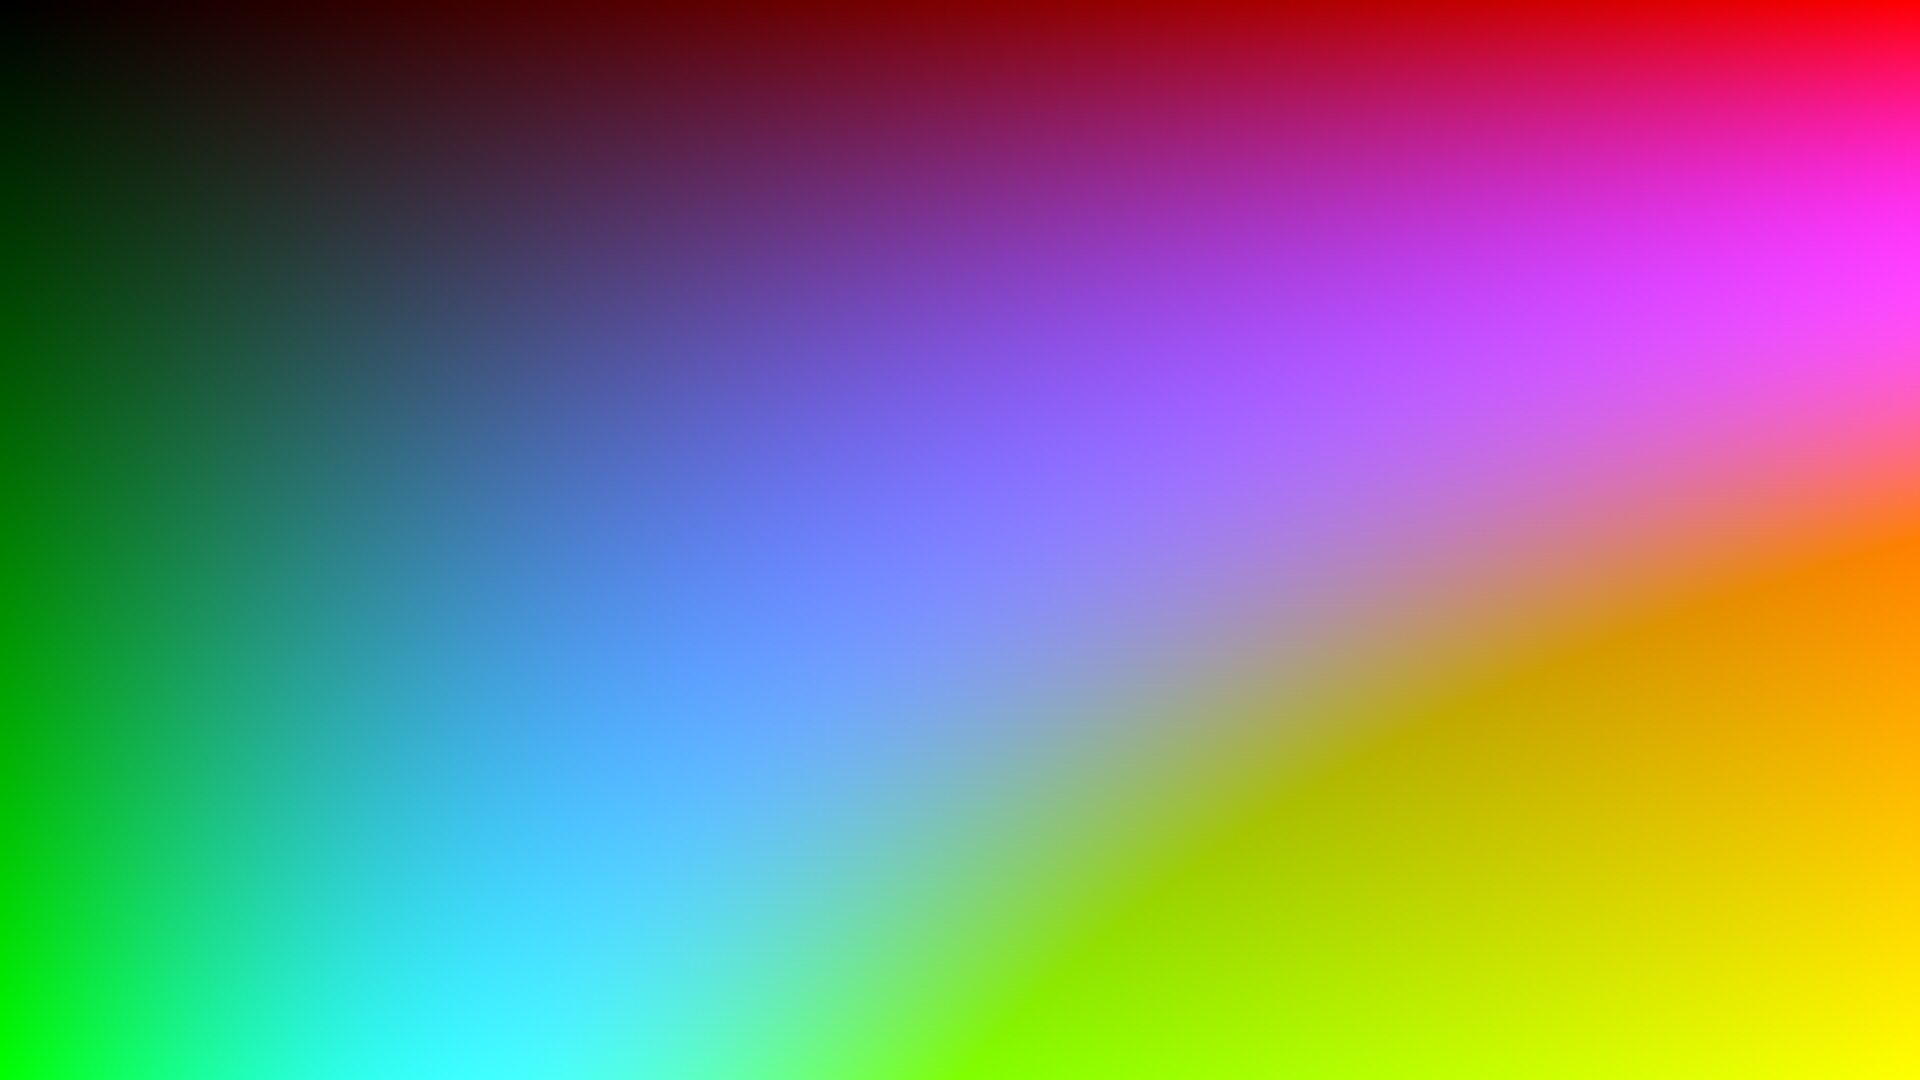
Imageinstance with a resolution such as 1920x1080. - In nested loops, populate the pixels with a custom pattern (such as a gradient where the red channel is
r = (float)i / image.Width, green isg = (float)j / image.Height, and blue is constant or a sine wave). - Print the image object to the console using
Console.WriteLine(image).
To save the image, redirect standard output to a file. Run the program with:
dotnet run > image.ppmGenerated PPM images take up significant disk space (often dozens of megabytes) and should not be tracked by Git. Remember to add
*.ppmto your.gitignorefile.
Stage 1#
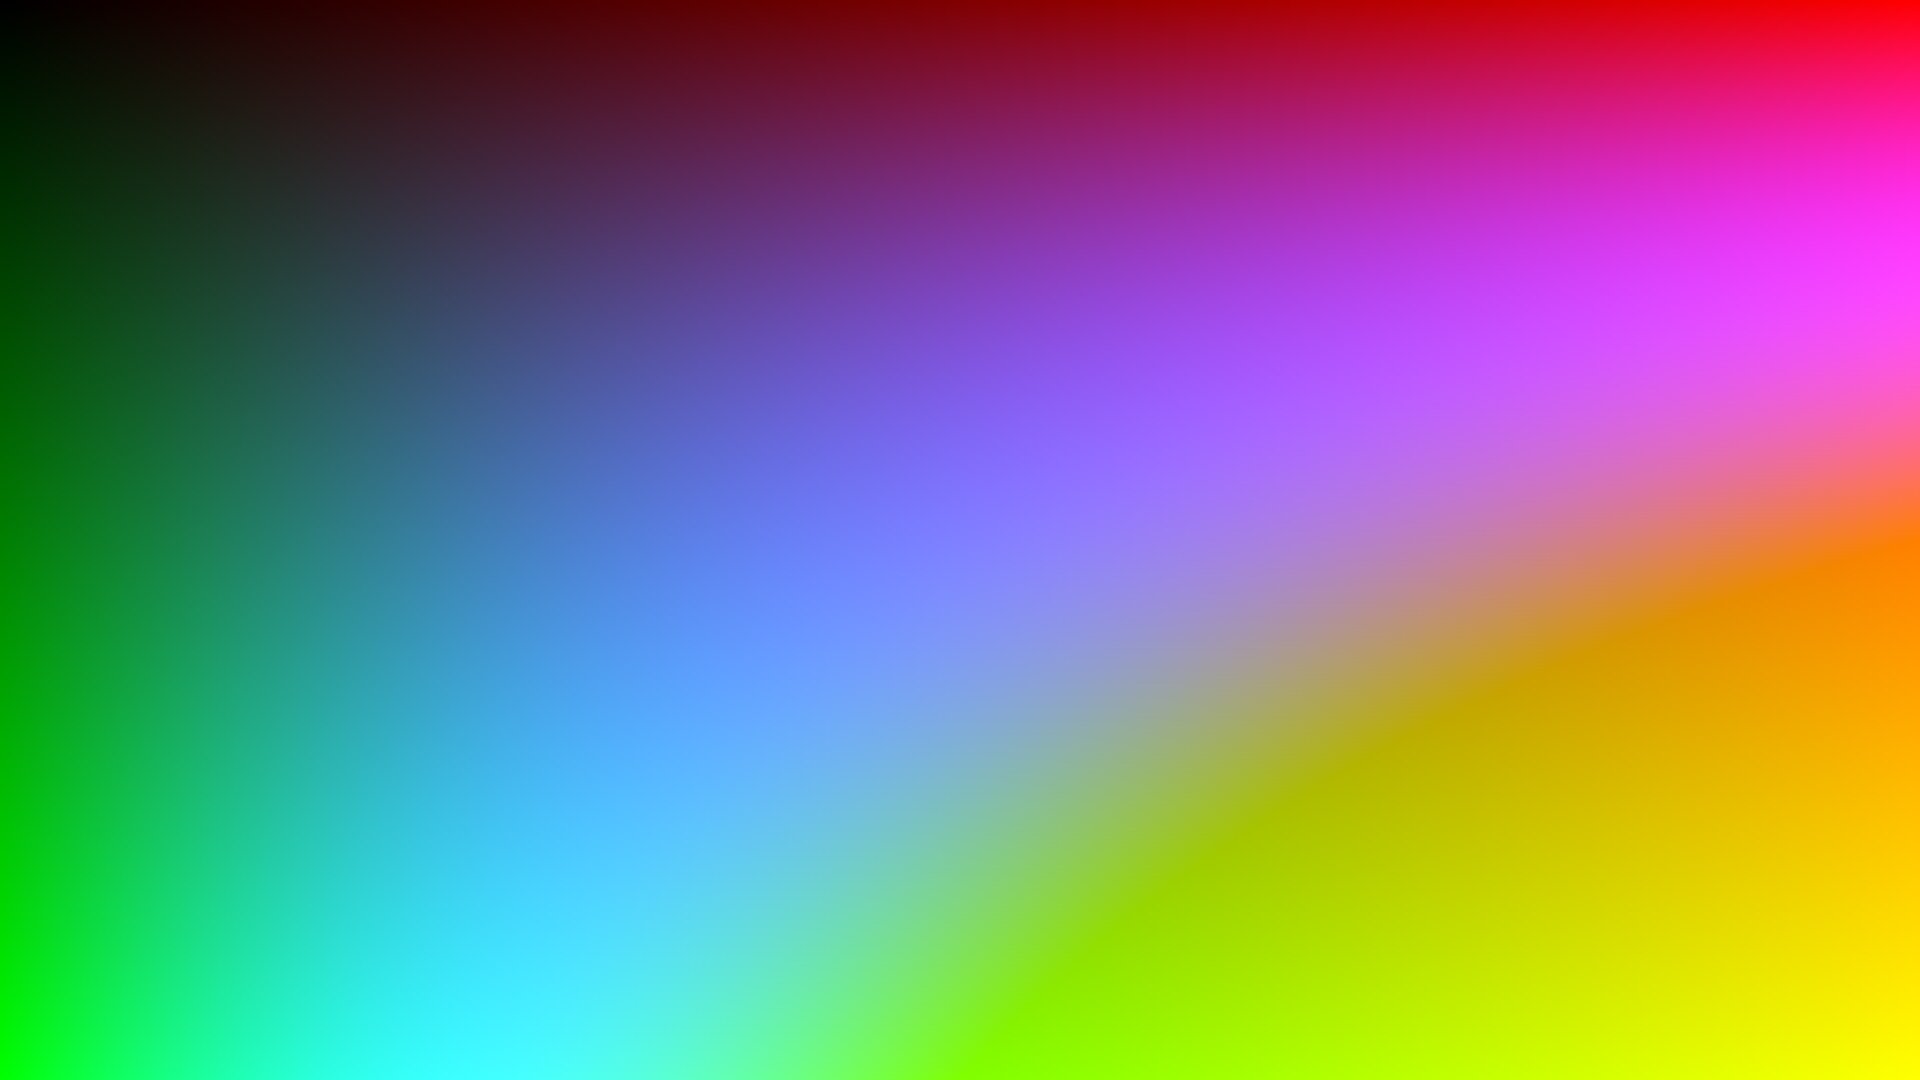
Stage 2: Camera and Rays#
In this stage, we will extend the Vector3 struct and implement a virtual camera alongside a ray struct (Ray).
Operator Overloading in C##
Before creating the camera, our
Vector3struct requires mathematical extension. In C#, mathematical operators are overloaded by defining public, static methods with theoperatorkeyword. Below is an example of overloading the addition operator for two vectors using expression-bodied syntax:public static Vector3 operator +(Vector3 u, Vector3 v) => new Vector3(u.X + v.X, u.Y + v.Y, u.Z + v.Z);
Extending the Vector3 Struct#
In Vector3.cs, implement:
- Overloaded operators: unary
-(vector negation), vector addition+and subtraction-, scalar multiplication*and division/(float), as well as component-wise multiplication*of two vectors (u.X * v.X,u.Y * v.Y,u.Z * v.Z). - The methods
LengthSquared()(returning squared vector length) andLength()(computing vector length). Use the staticMathFclass, which contains mathematical functions (such asMathF.Sqrt(),MathF.Tan()) optimized forfloatnumbers. - The static
Dot()method for computing the dot product. - The static
Cross()method for computing the cross product. - The
Normalize()method to normalize the vector.
The Ray Struct#
Each ray cast from the camera is a half-line described by the function \( P(t) = A + t \cdot b \), where \( A \) is the ray’s origin (Origin), \( b \) is its direction (Direction), and the parameter \( t \) represents distance traveled along that direction.
Create a new Ray struct (Ray.cs) and define:
- Read-only properties:
Vector3 OriginandVector3 Direction. - A constructor accepting and setting their initial values.
- A
Vector3 At(float t)method calculating the point \( P(t) \) in 3D space for a given parameter \( t \).
The Camera Class#
We will adopt a camera model where rays are cast straight from the observer’s position through the pixels of a virtual screen (viewport) placed in front of the camera.
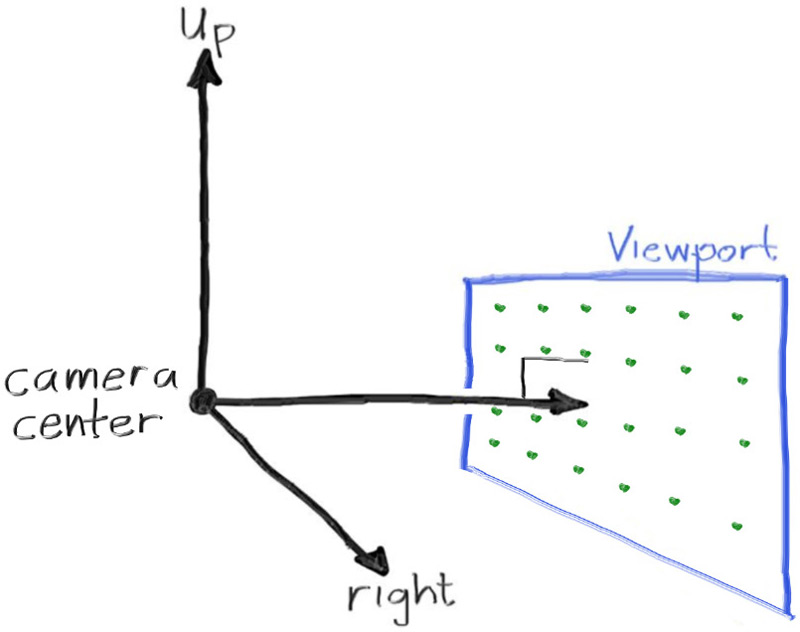 (Source: Ray Tracing in One Weekend)
Any change to a camera configuration parameter (camera position, target, or field of view FoV) requires recalculating viewport grid parameters. For this reason, we will back configuration properties with private backing fields, enabling the set accessor to trigger the recalculation logic.
public class Camera
{
    private float _fov = 90.0f; // Private field with default value

    public float Fov
    {
        get => _fov;
        set
        {
            _fov = value;
            Recalculate(); // Recalculate other parameters on change
        }
    }
    // ...
}
Create a Camera.cs file defining the camera:
- Define properties backed by private fields with default values:
float AspectRatio(16.0f / 9.0f),int ImageWidth(1280),Vector3 Position(new Vector3(0,0,0)),Vector3 Target(new Vector3(0,0,-1)), andfloat Fov(90.0f). TheTargetproperty defines the point in space where the center of the viewport is located. Eachsetaccessor must callRecalculate(). - Declare private fields storing viewport and camera parameters:
int _imageHeight,Vector3 _pixelDu,Vector3 _pixelDv, andVector3 _viewportCorner. - Add a parameterless constructor that calls
Recalculate()once during object initialization.
Implement the private Recalculate() method to compute viewport geometry:
- Image dimensions: Calculate height in pixels:
_imageHeight = (int)(ImageWidth / AspectRatio). - Physical viewport dimensions: Convert the field of view angle to radians
theta = Fov * MathF.PI / 180.0fand compute half the viewport heighth = MathF.Tan(theta / 2.0f). The distance to the viewport isdistanceToViewport = (Position - Target).Length(). The virtual screen dimensions are:- Height:
viewportHeight = 2.0f * h * distanceToViewport - Width:
viewportWidth = viewportHeight * AspectRatio
- Height:
- Orthonormal camera basis (
front,right,up):- Direction vector:
w = (Position - Target).Normalize()(pointing away from the target in a right-handed coordinate system). - Right vector:
u = Vector3.Cross(new Vector3(0, 1, 0), w).Normalize(). - Up vector:
v = Vector3.Cross(w, u).
- Direction vector:
- Pixel delta vectors:
- Horizontal viewport span:
viewportU = viewportWidth * u. - Vertical viewport span:
viewportV = viewportHeight * -v(pointing downwards, matching image row order). - Per-pixel step vectors:
_pixelDu = viewportU / ImageWidthand_pixelDv = viewportV / _imageHeight.
- Horizontal viewport span:
- Center of the first pixel: Determine the top-left corner of the viewport:
_viewportCorner = Position - (distanceToViewport * w) - viewportU / 2.0f - viewportV / 2.0f, then shift it to the center of the first pixel by adding0.5f * (_pixelDu + _pixelDv).
Stage 2#
Stage 3: Ray-Object Intersections#
In this stage, we will implement intersection detection between rays and scene geometry.
Intersection Information (HitInfo)#
When a ray intersects an object, we need to collect several pieces of information: the intersection point, the surface normal at the hit location, and the ray parameter \( t \) at which the hit occurred. These will be used later when computing ray colors and subsequent bounces.
Create a HitInfo.cs file with a struct storing hit details:
- Define public fields:
Vector3 Position,Vector3 Normal,float T, andbool FrontFace. - Define the
SetFaceNormal(Ray r, Vector3 outwardNormal)method. For correct lighting calculations, normal vectors must point against the incoming ray:- Check the dot product of the ray’s direction and
outwardNormal. - If negative, the ray hits from the outside (
FrontFace = true), andNormaltakesoutwardNormal. - Otherwise, the ray hits from the inside (
FrontFace = false), andNormalis inverted (-outwardNormal).
- Check the dot product of the ray’s direction and
Interfaces in C##
Interfaces are abstract types defining a contract – a set of methods and properties that an implementing class must provide. They do not hold state (fields) or implementation. In our program, every object that can be intersected by a ray will implement a common interface, enabling polymorphic handling of various scene geometries.
The “out” Modifier#
One way to return multiple values from a C# method is using the
outkeyword. It requires the passed variable to be initialized inside the method before exiting (e.g., a hit test method can return aboolresult, while outputting a populatedHitInfostruct via an argument).
The IHittable Interface#
Create an IHittable.cs file defining the interface (in C#, interface names conventionally begin with a capital I), declaring the method:
bool Hit(Ray ray, float tMin, float tMax, out HitInfo hitInfo);In C#, all members declared inside an interface are implicitly public (
public), hence they do not require an explicit access modifier in the declaration.
Implementing IHittable (Sphere and Plane)#
Every object in our scene (including the scene itself) will implement the IHittable interface. This contract indicates that rays can be cast against the object. Thanks to polymorphism, the camera does not need to know whether it is casting rays against a single sphere, an entire scene, or a triangle, as long as the object implements IHittable.
Create the Sphere class (Sphere.cs) implementing IHittable (class Sphere : IHittable):
- Add properties
Vector3 Centerandfloat Radius. - Define a constructor initializing the properties.
- Implement the
Hitmethod:- Compute the vector from the sphere’s center to the ray origin:
oc = ray.Origin - Center. - Compute quadratic equation coefficients:
a = ray.Direction.LengthSquared()halfB = Vector3.Dot(oc, ray.Direction)c = oc.LengthSquared() - Radius * Radius
- Compute the reduced discriminant:
discriminant = halfB * halfB - a * c. Ifdiscriminant < 0, no intersection – returnfalse. - Find the smaller root
(-halfB ± MathF.Sqrt(discriminant)) / alying within[tMin, tMax]. If neither root falls within range, returnfalse. - Fill
hitInfo: setT = root, hit pointPosition = ray.At(root), determine surface normal(Position - Center) / Radius, and pass it toSetFaceNormal(ray, outwardNormal). Returntrue. (More mathematical details can be found in the book).
- Compute the vector from the sphere’s center to the ray origin:
Create the Plane class (Plane.cs) implementing IHittable, representing an infinite plane:
- Add properties
Vector3 PointandVector3 Normal. Mathematically, a plane is defined by an arbitrary point on it (Point) and an orthogonal vector (Normal). Ensure the normal is normalized in the constructor. - Implement the
Hitmethod. A point \( P \) lies on the plane when it satisfies the equation \( (P - P_0) \cdot n = 0 \). Substituting the ray equation \( P(t) = A + t \cdot b \) and solving for \( t \) yields: \( t = \frac{(P_0 - A) \cdot n}{b \cdot n} \) In theHitmethod:- Calculate the denominator:
denom = Vector3.Dot(Normal, ray.Direction). - If the absolute value of the denominator is near zero (
MathF.Abs(denom) < 1e-6f), the ray is parallel to the plane – returnfalse. - Otherwise, compute the parameter:
t = Vector3.Dot(Point - ray.Origin, Normal) / denom. - If
tfalls in the range(tMin, tMax), populatehitInfo(setT = t, hit pointPosition = ray.At(t), normal viaSetFaceNormal(ray, Normal)), and returntrue. Otherwise, returnfalse.
- Calculate the denominator:
The Scene#
Our scene will consist of a collection of objects. To store items dynamically, we will use the generic List<T> class (from System.Collections.Generic).
Create a Scene class implementing IHittable. Define:
- A public list:
public List<IHittable> Objects { get; } = new List<IHittable>();. - An object addition method:
public void Add(IHittable obj) => Objects.Add(obj);. - The
Hitimplementation: iterate with aforeachloop overObjects. With each detected hit, update the upper search boundtMaxto the new hit’s distance. This ensures the finalhitInfocontains data for the closest object. Return aboolindicating whether any hit occurred.
Rendering the Image#
In the Camera class, add a Render method accepting the scene (IHittable world) and returning an Image. Inside nested loops iterating over image pixels (i across width, j across height):
- Compute the center position of the current pixel on the virtual viewport:
Vector3 pixelCenter = _viewportCorner + (i * _pixelDu) + (j * _pixelDv); - Determine the ray direction as the vector from the camera position to the viewport point:
Vector3 rayDirection = pixelCenter - Position; - Construct the ray
Ray(Position, rayDirection)and test for intersections against the scene (world.Hit(...)).
If the ray hits an object, set the pixel color to red ([1, 0, 0]). Otherwise, set it to black ([0, 0, 0]).
In the Main method of Program.cs:
- Create a
Sceneinstance and add a sphere at(0, 0, -1)with radius0.5, along with a plane at(0, -0.5, 0)with normal(0, 1, 0). - Configure the camera: set
Positionto(0, 0, 1)andTargetto(0, 0, -1). - Call
cam.Render(world)and print the resulting image to the console usingConsole.Write(image).
To render the image, run the program and redirect standard output to a file:
dotnet run > image.ppmStage 3#

Stage 4: Materials and Recursion#
In this stage, we will add support for materials that define how rays behave upon hitting surfaces.
Abstract Classes#
You cannot directly instantiate an abstract class. It serves as a base definition for derived classes. It can contain abstract method declarations (equivalent to pure virtual functions in C++, e.g.
virtual void Method() = 0;), which have no implementation and must be defined in derived classes, as well as virtual methods that provide default implementations that can optionally be overridden.
Passing Arguments by Reference#
Passing arguments by reference avoids copying structs in memory during method calls. C# provides three keywords for this purpose:
out– output argument. The passed variable does not need to be initialized before the call, but must be initialized inside the method before exiting.ref– two-way reference. The variable must be initialized before being passed into the method.in– read-only reference. Guarantees that the argument cannot be modified inside the method.
The Material Class#
In Material.cs, define the abstract Material class:
- Declare an abstract method:
public abstract bool Scatter(in Ray rIn, ref HitInfo hitInfo, out Vector3 attenuation, out Ray scattered);. It receives the incident ray (rIn) and hit details (hitInfo). Via output arguments, it returns color attenuation (attenuation) and the scattered ray (scattered), while returningboolto indicate whether the ray was scattered/reflected. - Declare a virtual method
Emit()returning a zero vector by default (new Vector3(0, 0, 0)).
EmissiveMaterial#
In EmissiveMaterial.cs, create the EmissiveMaterial class inheriting from Material. It models a material that emits light. Define:
- A
Vector3 Colorproperty initialized via the constructor. - The
Scattermethod, which returnsfalse(indicating no further bounce) and assigns default values tooutvariables. - The
Emit()method returningColor.
Linking Materials with Scene Geometry#
Update intersection structures to expose hit material properties:
- In
HitInfo.cs, add the fieldpublic Material Mat;. - In
SphereandPlane, add the propertypublic Material Mat { get; set; }and assign it in their constructors. - In the
Hitmethods of both shapes, assign the material to the output struct (e.g.hitInfo.Mat = Mat;).
Recursive Color Evaluation#
In Camera, add the property public int MaxDepth { get; set; } = 50;. It sets a limit on recursive ray bounces, preventing stack overflows or infinite loops (e.g., rays bouncing indefinitely between parallel mirrors).
Modify the inner loop in Render to use a recursive RayColor method:
image[i, j] = RayColor(ray, MaxDepth, world);Implement the private method RayColor(Ray ray, int depth, IHittable world):
- Termination condition: if the bounce depth limit is reached (
depth <= 0), terminate recursion and return black[0, 0, 0]. - Test scene intersections with
world.Hit(ray, 0.001f, float.PositiveInfinity, out HitInfo hitInfo). If nothing is hit, return black. - Retrieve light emitted by the surface (
hitInfo.Mat.Emit()). - Call
Scatter(...). If the material scatters the ray (true), return the sum of emitted light and the recursive resultRayColor(scattered, depth - 1, world)multiplied byattenuation. - Otherwise (no reflection), return only the emitted color.
The
tMinvalue inHitis set to0.001fto avoid floating-point inaccuracies. This prevents rays from mistakenly intersecting the very surface they originated from (the shadow acne artifact).
Verifying Stage Four#
In Program.cs, update scene setup. Create a red sphere, a white plane, and a large light-emitting cyan sphere with radius 1000 enclosing the scene (a skysphere), then render the image:
world.Add(new Sphere(new Vector3(0, 0, 0), 1000.0f, new EmissiveMaterial(new Vector3(0.5f, 0.7f, 1.0f))));
world.Add(new Sphere(new Vector3(0, 0, -1), 0.5f, new EmissiveMaterial(new Vector3(1, 0, 0))));
world.Add(new Plane(new Vector3(0, -0.5f, 0), new Vector3(0, 1, 0), new EmissiveMaterial(new Vector3(1, 1, 1))));
Stage 4#

Stage 5: Matte Material and Antialiasing#
In this stage, we will implement a diffuse (matte) material and edge antialiasing.
Generating Random Vectors#
Diffuse materials scatter rays in random directions, requiring the Vector3 struct to be expanded with random vector generation. We will use System.Random.Shared, which provides a thread-safe pseudo-random number generator instance.
In Vector3.cs, implement three new methods:
NearZero(): Checks whether a vector is close to zero across all three axes. A vector is near zero if the absolute value of each component is below a threshold (e.g.1e-8f). This avoids numerical issues when computing scatter directions.RandomInUnitSphere(): Implements rejection sampling. In a loop, pick random coordinates in[-1, 1). If the vector’s squared length is less than 1 (meaning the point lies within the unit sphere), break and return it. UseSystem.Random.Shared.NextDouble()to generate random values in[0, 1).RandomUnitVector(): Returns a unit vector. This simply normalizes a non-zero vector returned byRandomInUnitSphere().
Lambertian#
In Lambertian.cs, create the Lambertian class inheriting from Material. It models an ideal matte surface that scatters light in all directions with varying intensity according to Lambert’s cosine law.
In physical reality, diffuse reflection scatters many rays in all directions. Splitting rays exponentially at each bounce would quickly cause a ray explosion. Path tracing avoids this through a Monte Carlo approach: Scatter generates a single reflected ray in a random direction. The diffuse look emerges naturally as multiple random samples are averaged per pixel.
In the Lambertian class, define:
- A
Vector3 Albedoproperty (defining reflectance/base surface color) initialized via the constructor. - An overridden
Scattermethod. It calculates the bounce direction (scatterDirection) as the sum of the surface normal and a random unit vector (RandomUnitVector()). - Safeguard the direction using
NearZero(). If the random vector exactly opposes the normal, fall back to using the normal vector itself. - Return the secondary ray and assign
Albedotoattenuation. The method returnstrue.
Antialiasing#
Currently, exactly one ray is cast through the center of each pixel. Because a ray is an infinitesimal sample, it either hits an object or misses it entirely. At finite resolutions, this causes jagged, stair-stepped silhouettes (aliasing). Antialiasing addresses this by casting multiple rays per pixel with slight random sub-pixel offsets, averaging the returned colors.
In Camera, add the property public int SamplesPerPixel { get; set; } = 100;. It defines how many rays are cast per pixel.
Update the inner loop in Render to accumulate color across samples:
- Generate random offsets
offsetXandoffsetYin the range[-0.5, 0.5). - Compute the sub-pixel viewport position by adding the offsets to
iandjbefore multiplying by_pixelDuand_pixelDv. - Cast a ray from the camera through this point, adding the result of
RayColorto a color accumulator. After completing all sample iterations, divide the accumulated color bySamplesPerPixeland write the result to the image grid.
Final Result#
In Program.cs, update scene setup. Create three Lambertian spheres with different colors side by side, and a green plane. Keep the enclosing light-emitting sphere as the sky:
world.Add(new Sphere(new Vector3(0, 0, 0), 1000.0f, new EmissiveMaterial(new Vector3(0.5f, 0.7f, 1.0f))));
world.Add(new Sphere(new Vector3(0, 0, -1), 0.5f, new Lambertian(new Vector3(1, 0, 0))));
world.Add(new Sphere(new Vector3(-1.1f, 0, -1), 0.5f, new Lambertian(new Vector3(0, 0, 1))));
world.Add(new Sphere(new Vector3(1.1f, 0, -1), 0.5f, new Lambertian(new Vector3(1, 1, 0))));
world.Add(new Plane(new Vector3(0, -0.5f, 0), new Vector3(0, 1, 0), new Lambertian(new Vector3(0.2f, 0.8f, 0.2f))));
Render the final image with dotnet run > image.ppm.
Stage 5#
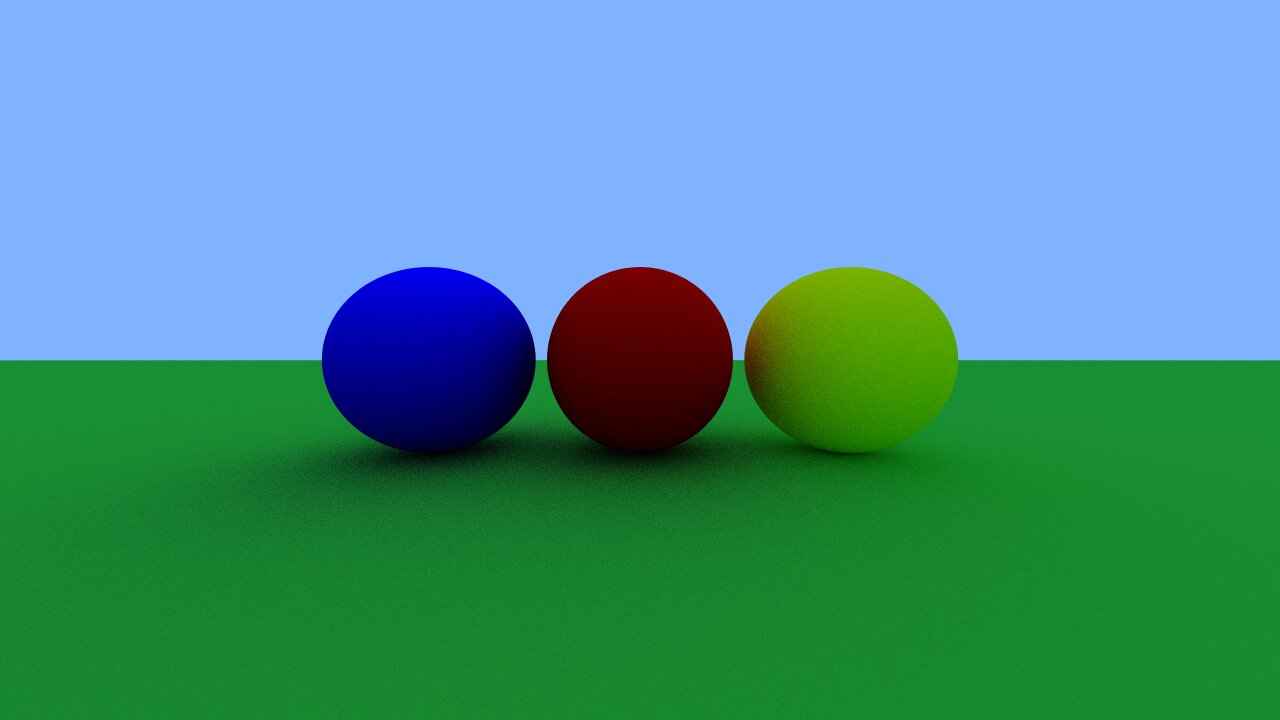
Gamma correction: The output color values are in linear space. Because computer displays apply a non-linear transfer function (gamma), the rendered image may appear darker in shadows. To achieve accurate tonal reproduction (sRGB standard / gamma ≈ 2.2), raise each color component to
1 / gammabefore saving (or approximate withMathF.Sqrt(color)for gamma = 2).
Next Steps and Further Enhancements#
The application built in this tutorial provides a solid foundation for further expansion. Below are key features to explore next:
- Other Materials (Metal, Dielectric/Glass): Currently, surfaces only scatter diffusely. Specular reflection (mirrors) can be added by reflecting rays across the normal. Transparent materials (glass, water) require Snell’s law refraction and angle-dependent reflectance (Schlick’s approximation).
- Triangle Meshes and 3D Model Loading: Most 3D graphics rely on triangles. Implementing ray-triangle intersection enables importing 3D models exported from Blender in standard formats such as OBJ.
- Exporting to Standard Image Formats: While PPM is simple, it is uncompressed. In .NET projects, external libraries like SixLabors.ImageSharp (similar to stb_image in C/C++) are standard for reading and writing PNG or JPEG files.
- BVH Acceleration: Testing intersections against every scene object scales poorly with large meshes. Bounding Volume Hierarchies (BVH) organize geometry into trees of bounding boxes, dramatically speeding up rendering by pruning empty branches.
- Texture Mapping: Our system currently uses solid colors. Textures can be mapped onto geometry by associating UV coordinates with vertices and sampling texture images at ray hit points.
Example Tasks#
Complete an example task from previous years. If you are able to finish it within 90 minutes, you are well-prepared for class.